Showing posts with label Tutorial. Show all posts

Friday, September 9, 2011

Maxi Skirt into Fall Tunic

I had this floral maxi skirt that used to be my mom's. 

I had worn it as a dress previously with a wide belt.


But today I decided this would make a super cute tunic, since the weather is cooling down. 
It was a pretty easy transition. I'm really kicking myself for not taking pictures along the way. 
So I'm going to do a diagram instead :)

First, cut the elastic waistband off the skirt.
The skirt will have a front and back piece, so turn the skirt inside out and stitch the two pieces together across the top leaving an opening in the middle for your head (if you want it off the shoulder, make the opening wider).
Fold the skirt in half and cut the neckline of the front piece lower than the back. Then cut down the sides to give the skirt a shirt shape.
Unfold the shirt and sew the sides together. 
Technically, you're done. But I like flair. So I added a lace collar and two buttons on the side.
You can also sew in elastic for a fitted waist. 

Here's a picture of how my tunic turned out. (sorry if the diagram is hard to fallow. It probably is)


I made a belt out of the elastic waist portion we cut off earlier.


But I have another belt that fits tighter.


And there you have it. That's how you make a maxi skirt into a tunic top. 

Thursday, August 11, 2011

Tangled Puppets

I tried taking pictures step by step while making these puppets of Rapunzel and Eugene (Flynn) but I got so excited and carried away that I skipped a few steps. Luckily, I don't think they were important steps to photograph, so I dub this tutorial ready.

I used scraps I already had, but you could go to just about any fabric store and buy small squares of fabric for only a few cents to make these puppets. 

This is the fabric I used for Rapunzel: 


And here is what I used for Eugene: 


I used a tan shirt I had that no longer fit, took out my fabric pen and drew on their faces: 


Oh, hey. I got his nose right.

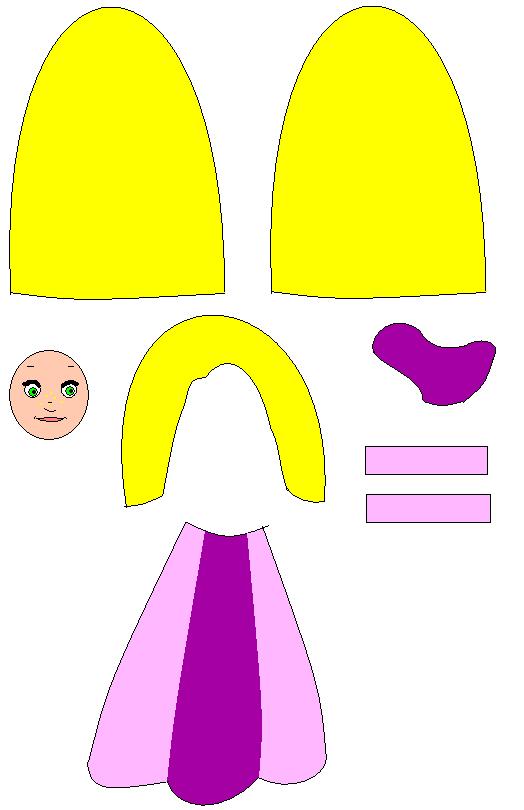
I cut out basic shapes. For Rapunzel I cut two identical hair pieces. 


One I placed her face and clothing on (and more hair) so it looked like this. Nothing fancy, basic shapes.  


Eugene was a little tricky, but I opted for a green, forest-y background. 


So he turned out like this:


After you have it placed out, sew the shapes on. You will probably want them pinned in place first.


I later realized, I should have measured MY hand before making these puppets, and not my 3 year old's as she will grow and likely want to continue playing with them, so, you should make these big enough for your kids to grow into. And also, probably leave more background for Eugene. I had problems with his head...

Now, leaving them face side up, take the identical hair piece for Rapunzel and the identical background piece for Eugene and place them on top of sewn together Rapunzel and Eugene, so you can stitch around the sides (leaving the bottom open for your hand to slip in). 

Turn them inside out and you're done! 


Wednesday, August 10, 2011

T-Shirt into Wet Seal Inspired Dress


This is on the Wet Seal website, going for $26.50. It's not something I would typically wear. It's not something I have a place to wear it to even if it were my style. But for some reason (maybe it was the color) this dress called to me, and I said, "I bet I can make this." (I said that about a wedding dress yesterday too) So here is a little tutorial. How to transform an x-large (or large) t-shirt into this body hugging dress. 

First lay out your t-shirt, turn it inside out and cut off the sleeves. 


Not the best quality photo, but hopefully you get the idea. 

Next, cut off the neckline and shoulder portion of the shirt straight across.


Put the shirt aside and grab the sleeves you removed. Cut along the seam to open the sleeves up. 


It should look like this.


Take the sleeves and pin them together to make one long piece. Start an inch down from the first sleeve and overlap the hemmed sections. Make sure the sleeves are facing the same way. This part sounds confusing, but it's not. 
 It will look like this on the table... 


And like this when you hold it up.


Next sew the sleeves closed, gradually blending into the rest of the shirt.


Fold the shirt in half lengthwise  so the bottom corners are together. Round the edge so the dress will hug your hips. 


Turn your dress inside out. Grab some measuring tape and measure from the top of your chest (where you want your dress to sit over your bust) down to under your bust-line. Make a mark. Take the sleeves that you stitched together and pin it by your mark, not directly down the middle of the dress, but off to the side a little. Stitch over the hemmed sleeve part.


Take the top of the shirt that you cut off earlier (the collar and shoulder portion) and cut small circles out of it. You can cut out as many as you want. Cut out some from white material and I added some lighter pink as well. 


Lay the circles over each other on the shirt until you have a pattern you like, pin in place and sew. 

For the waist portion, there are a couple ways you can do this. You could turn your shirt back inside out and stitch elastic under the bust-line or you could use ribbon, lighter fabric even lace and stitch it on the front. I used ribbon.  (forgive the light fabric stitched to the top of the dress, mine was too low so I had to make it longer)

  
Once the dress is finished, it should look something like this. 


Have at it :)


Shirr Goodness


I like shirred dresses. Correction. I love them. So when my mom made this green shirred dress for my baby shower 3 years ago, I was ecstatic. I mean, the dress was shirred, and it was my all time favorite color! Of course, after breastfeeding my oldest, getting pregnant again and breastfeeding my youngest (currently still breastfeeding) things change. So the shirred dress no longer fit. *insert sad face here*

However, in light of my recent craftiness, I came up with a solution. A spin off of the t-shirt dress that you can find virtually anywhere on the web. Like here: http://talk2thetrees.blogspot.com/2010/07/how-to-make-easy-high-waisted-dress-for.html
and here: http://waldeckdrygoods.blogspot.com/2009/02/t-shirt-dress-tutorial.html
and here: http://sewingdork.blogspot.com/2010/07/womens-tank-top-dress-refashion.html
and even here: http://www.fortunecity.com/victorian/operatic/312/tshirt.htm.

So I took this tank top that was way too short for me anyway and cut off the top, stitched that to the top of the shirred dress and there I have the perfect fitted summer dress. And in my favorite color, too! Oh happy day!

The shirred dress worn at my baby shower over 3 years ago.


The tank top worn this year on free love day.


And the two stitched together.


Maternity Pants Are Still Useful After Baby.


I keep things that I probably shouldn't. Like maternity pants when my youngest and last baby is almost a year old. Turns out this is a GOOD thing (this time). The secret fit belly on maternity pants is PERFECT tube top material. Yup. Stretchy, comfy and supportive =]

I also keep shirts that used to fit but probably no longer will because after breastfeeding two kids things just aren't the same size anymore. This is a good thing, too.

So here we are, I will show you how I made the secret fit belly from two pairs of maternity pants into a summer shirt and a tube dress.

We'll start with the shirt first. It used to be a tube top for smaller chested women, or bigger chested women who really wanted to flaunt their stuff. It no longer fit me (in a comfortable way.) So I hacked off the shirred chest part and cut off the belly part of my maternity pants.


Then I sewed the two together and used the tie from the shirt as the straps. Now it fits perfectly. 


The tube dress was done much the same way. I had this long tunic shirt-thing that you wear over leggings. I didn't like the straps, or how small the chest piece was so I hacked it up and used the belly portion of my maternity pants.


 Yes, it puckers funny in the front. I'm going to fix that. I just don't know how yet.

I used the straps from the original tunic-thing to make a belt.

 Yes, I made this tube dress also. I should have thought to do a tutorial for the belt, because it is a GREAT belt and super easy. So I'll have to make it again.

I used the chest piece from the tunic-thing as a wide belt. Next time I'll do a tutorial for that as well.

And that is how you turn your maternity pants into tops for dresses or shirts. =]